Showing posts with label beehive. Show all posts

Monday, April 17, 2023

Bee Yard Bucking and Blooming Bulbs.

As with all projects, things happen in steps and tackling them as a whole can seem so daunting that its paralyzing to even start... but breaking it down into manageable chunks can bring daily feelings of accomplishment and at the end of the week you can look back at your pictures and revel in the journey it took to get to this feeling of accomplishment. Nature and homesteading has its way of humbling and challenging us. In the frigid months of February during a family dinner Cassi and Hazel talked about how fun it would be to have a beehive again. When we took our first foray into beekeeping it coincided with the news that baby Hazel was on her way, so out of an abundance of caution, Cassi took a backseat to the bee work and I took the reigns. After a challenging couple seasons of learning how to keep a hive happy and well cared for, all the while juggling the new found roles of being parents we took a break from bees after the hive collapsed over the winter. Still having most of the equipment from that time made the decision to reboot a lot easier and over the next month I inventoried our hive supplies and ordered up a package of Italian bees with a marked queen from Backwoods Bee Farm as a Valentines gift to my beautiful wife.


As the days grew warmer and the crocuses began to lift through the soil our bee package arrival date grew closer and closer. We took a family trip to the Honey Exchange in Portland to grab some new frame hardware and a bottom board along with a new hive feeder and a bee veil for Hazel. The rest of the week it was full throttle on bee prep as we constructed the frames, sanded the old boxes, painted the new boards and shined up the copper roof to our old hive. The one BIG project that loomed over the bees arrival was finding the right spot to locate the hive at the homestead. We had the perfect spot that the bees seemed to like in our previous endeavor... the only problem was when we had the giant maples taken down last year we had them pile up the wood right in our clearing that was our bee area. 


So here is where a daunting task that seemed paralyzing weighed on me... staring at this pile of massive logs stacked 8ft high and 15ft across. Hmmm. What to do, what to do. I first thought if I just cleared a little section for the hive it wouldn't take too much effort but then as I started working on that idea I began thinking about how I probably wouldn't want to be running a chainsaw a few feet away from the beehive, nor do I want to be rolling massive half ton logs around the hive once its established... bring on the impending feelings of doubt and desperation!  I started looking for other locations for the soon arriving hive. We do have lots of land, but only a few areas that get full morning sun and most of those spaces are right in our high traffic areas around our garden and our patio area. They didn't seem like good options as you never know what the demeanor of your hive will be and we wanted to have the bees in a space that is easy to monitor from the house but not so close that its gonna get any not-so-bee friendly folks antsy when they come to visit. After a day or two of procrastinating I decided that as long as I could buck up the pile into manageable chunks and get the chainsaw work out of the way, then I could spend the rest of the summer loading the chunks into a wheelbarrow and splitting them at my own leisure. My mind was set and everyday for about a week after I got home from work I spent 2-4 hours getting it done one section at a time. Tackling the edges and end sections of the giant pile and gradually gaining more confidence in my work ethic, chainsaw abilities and overall plan of action. I really got to know my chainsaws limits and quirks through the process and with each cut felt more empowered and enthusiastic about the project. I spent my evenings honing my chainsaw sharpening skills, musing about things I could utilize some of this wood for, besides just firewood. I spent a few late nights researching a new splitting axe to splurge on with all this bucked wood to split. More on the axe selection when I start splitting some wood next week! 


Slowly but surely, cut by cut I made my way through the stacks...


One tool I had purchased a few years back to help me with projects like this was the LogOx!
I had used it a handful of times pulling logs out of the woods for our raised beds but navigating my way around these 1000lb+ logs made it indispensable. So many times I thought I hit a road block and was like... how in the world am I going to get this thing into a manageable position to be able to buck it up, and after getting creative with the LogOx I was like damn, I did it! Its made in the USA and for a homesteader on a wooded lot, I would highly recommend it. The price of it seems to have doubled since when I originally purchased it years ago but hasn't everything! Even at the current price I would highly recommend it for anyone doing solo tree work on a somewhat regular basis. It truly is like having an extra set of hands and gives a ton of leverage and control over trunks that I didn't think I could ever maneuver through!


Its also great for keeping your chainsaw out of the dirt during the bucking process as well!


Progressing along nicely and I even took a moment to swing the axe a few times after another long afternoon on the chainsaw.


This trusty lil hatchet  was another resourceful tool for cleaning up some messy spots here and there.
I have really been inspired by some of the high quality tools I have slowly acquired over the years. Its amazing how much a good handmade tool can make a project more enjoyable.


When the sun went down the projects moved into the cellar where we methodically constructed the hive frames and wired in the beeswax foundations that the hive will build their comb on. Its a bit of a tedious job applying glue to all the lil connections then hammering all those tiny nails in but with a cold beverage and some good tunes we made quick work of it and finished up the hive with a couple coats of exterior paint just in time for bee pick up day to arrive!


Our 3lb package of Italian Bees were picked up from Georgia on Thursday, driven to Maine on Friday and we got them to their new home on Saturday afternoon! Cassi and Hazel were excited to suit up and show our 10,000 new friends where they will be staying now!


Here is our queen with a few attendants alongside. In a 3lb package they take bees from a thriving hive and place a new queen in the package with them. It takes them a couple days of getting to know one another before the hive will accept the queen and to protect her they put her in the small box inside of the package so they can become acquainted. Our job is to remove the cork on the candy side of the cage where there is a marshmallow blocking the exit. Over the next couple days the queen and her attendants will chew their way out and hopefully the hive will embrace her as their Queen and the magic of a beehive will begin !


Once the Queen is securely placed in the hive, you simply shake the others out of the package into the hive as Cassi is so gracefully doing here, then you gently ease your remaining frames into the box, being very careful not to squish many bees in the process. Cassi then secured the lid and placed a feeder solution of sugar water inside another empty deep box on top. That will nourish them until more food is available and they get their bearings around our homestead and abroad!


The mostly empty package is set down in front of the hive so the stragglers can find their way in before nightfall.


The area was buzzing with energy as they spread their wings to navigate the new surroundings, take a cleansing flight and then hopefully concentrate their efforts on building up some comb for the queen to start laying a new brood .


Just as dusk settled in the package was empty and the hive was huddled up staying warm in their new climate here in Maine'. 


I did find this straggler on the wood pile and I told him not to stay out too late before heading in for the evening!


What a lovely weekend, maybe a lil too hot to fast but all the bulbs are happy to soak it in after being covered in a good snow pack most of the winter! Everyday everyone is peeking out to check for new shapes and colors of the marathon bulb planting that happened after Thanksgiving! So far I'm seeing lots of success and the added beauty to the muddy terrain has spring fever sweeping the homestead! 


Long Cup aka Trumpet Daffodils


White Hyacinth
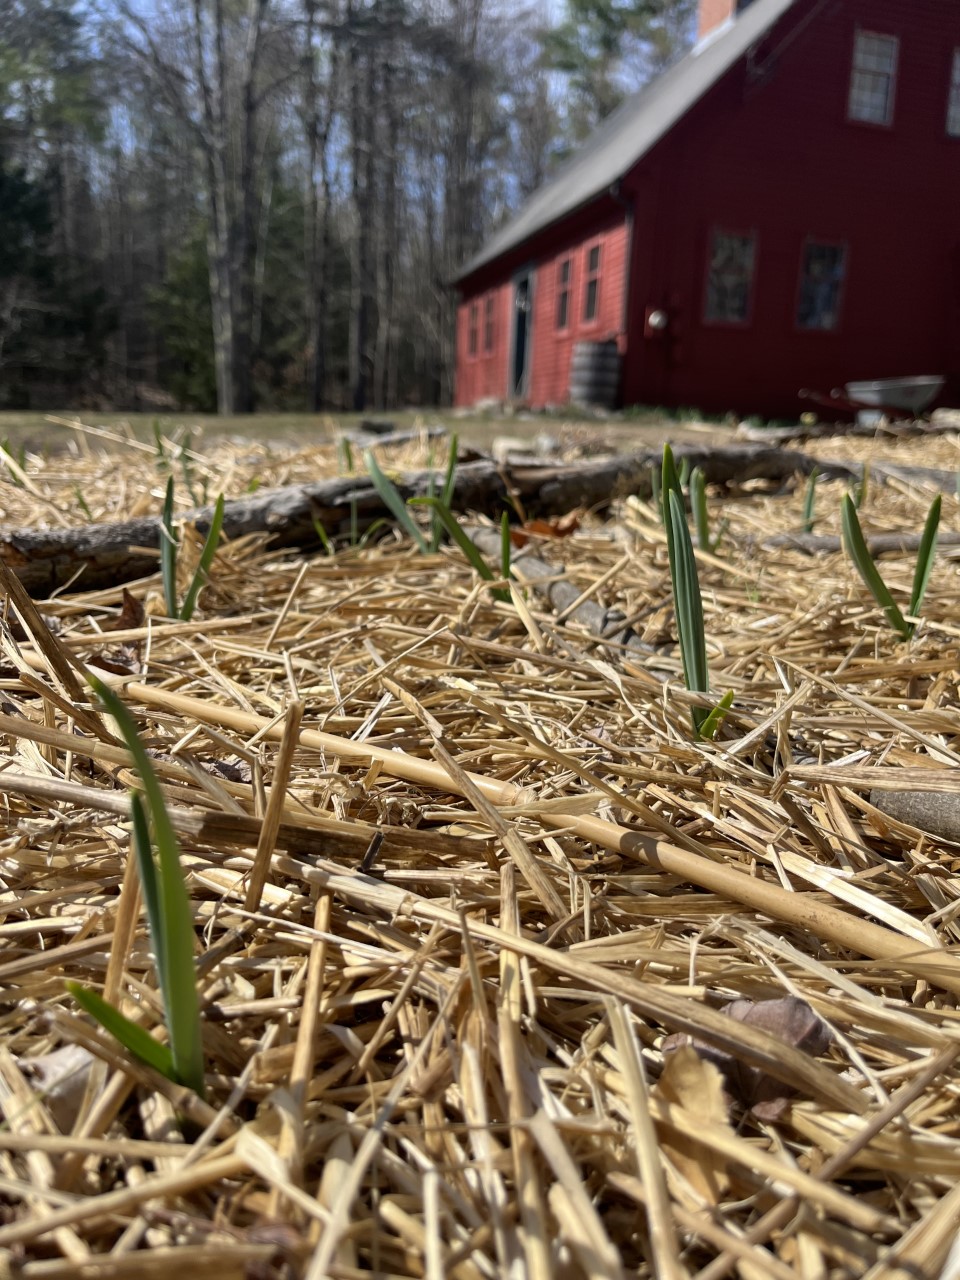

And of course Garlic, always an early showoff in the garden along with the chives!
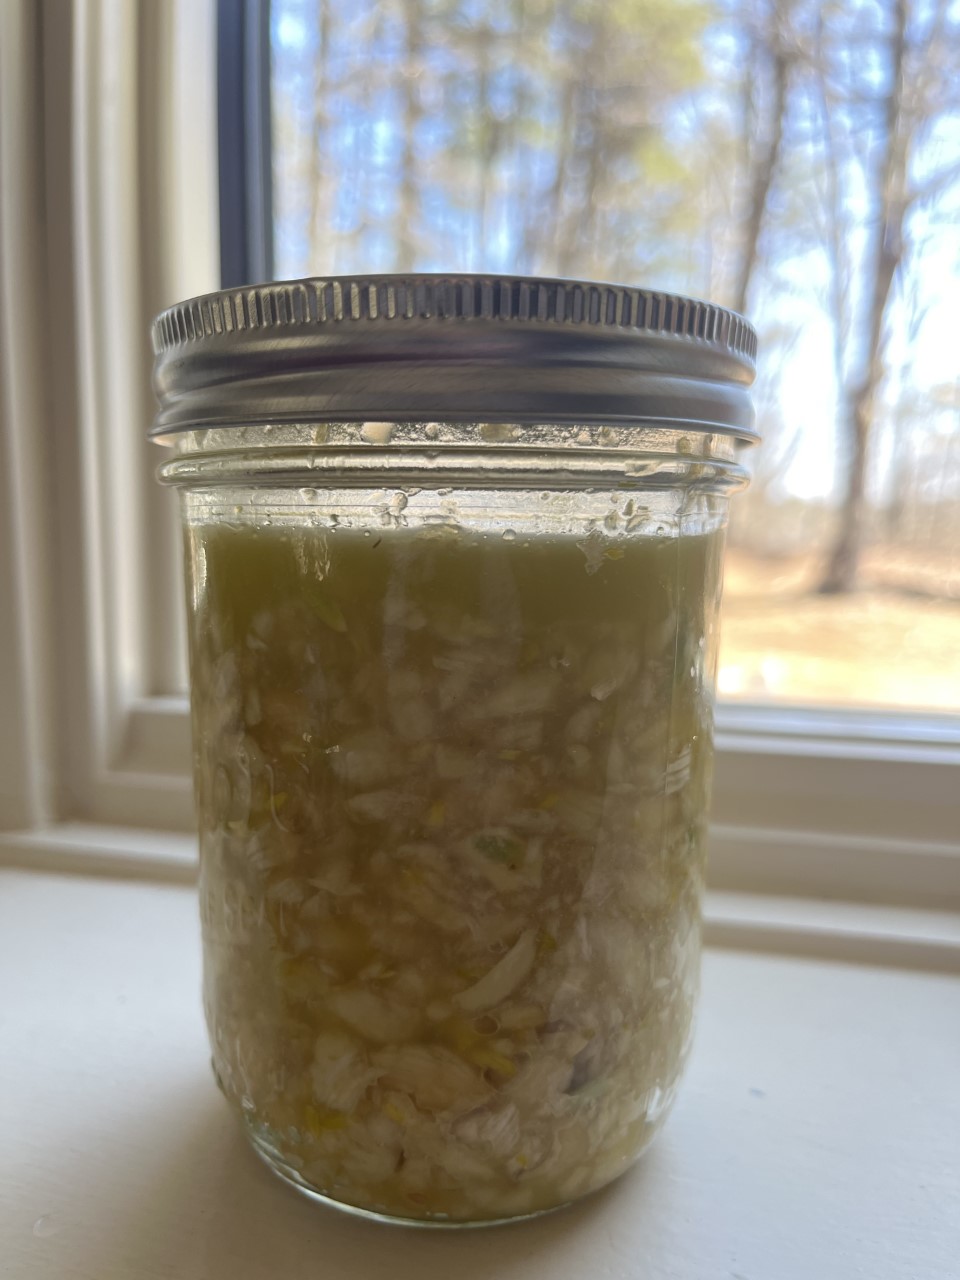

Seeing the garlic sprouting up made me assess our current kitchen supply and with a good amount left from last years harvest and a bit of sprouting beginning I decided to take a moment, peel it all and chop it up with some sea salt and olive oil. This should hold us over a month or so until the scapes start forming!
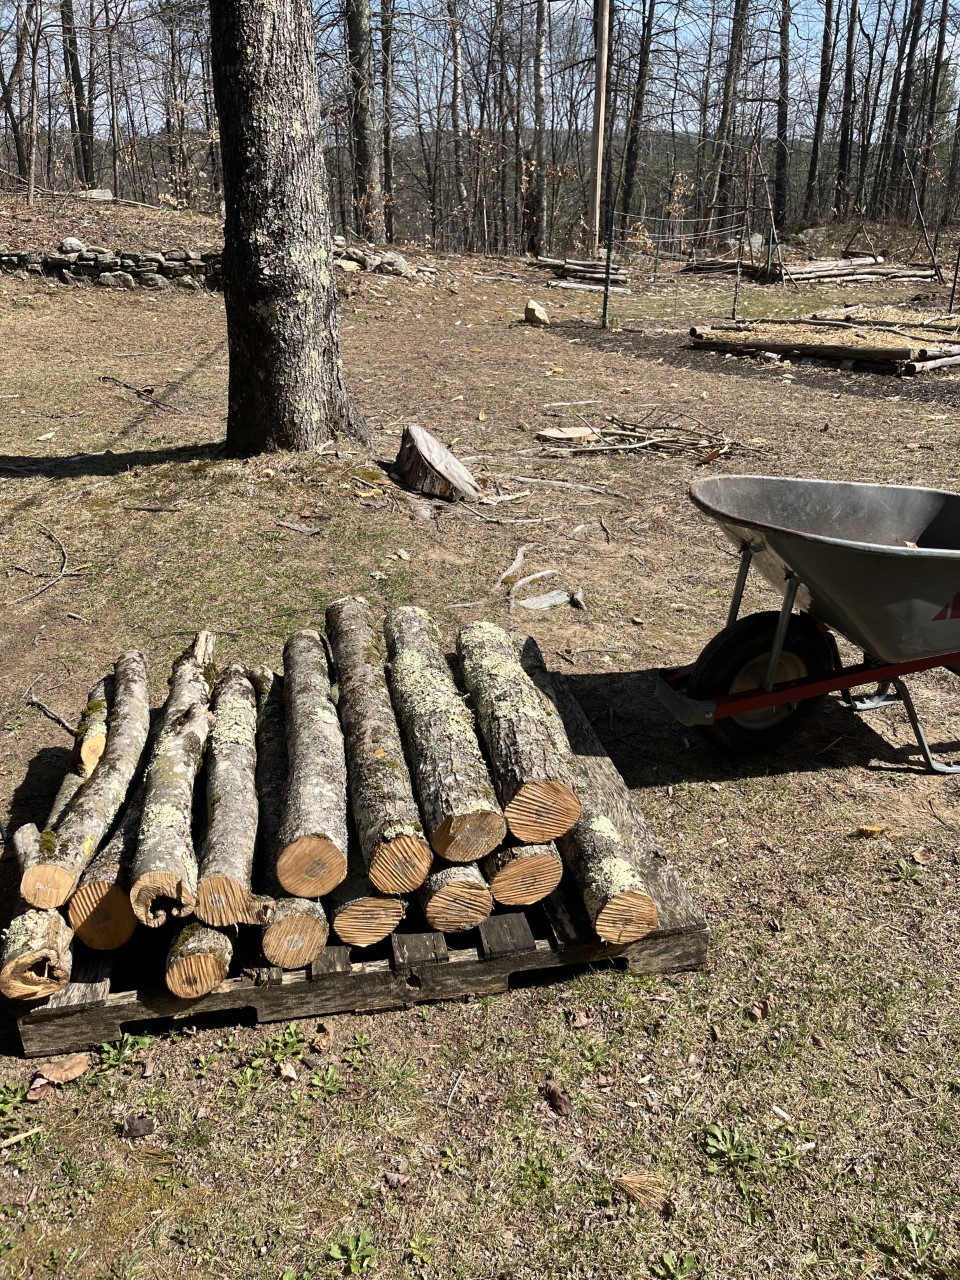

As this sunny  summerlike weekend wraps up and all the bees get settled we look forward to some other projects on the horizon for the week ahead. I dropped a few small sugar maples while the chainsaw was sharp and cut them into 3ft sections in preparation for some more mushroom experiments! The grain jars from last post are colonizing wonderfully, more liquid cultures have arrived and some other fungal experiments are going down so stay tuned for a new mushroom geek post coming soon... Along with that its go time for starting seeds and our germination station is prepped and ready for sprouting!


Till next post...

Tuesday, May 24, 2016

Building Colonies and Pollinating the Prairie Fire.

Bees, bees, bees.

The buzzing hive has been building up to a nice healthy colony over the last month of having them installed at the homestead.

We finally got a chance to take a thorough look at what was going on inside our hive and figured we would share in our learning experience.


First step is a few puffs of smoke at the entrance and then another one on the top of the hive to calm the bees down and also disorient them for a moment. Most times I forgo the use of smoke but being new to the hobby I use smoke when I plan on pulling frames and analyzing the productivity of the hive.


After removing the top box that houses our feeder it was time to pull all the frames and see what the ladies have been up to as of late. 


 Every frame had drawn comb and the inside 6 frames had a good amount of capped brood.
Brood is essentially the term for baby bees. They start out as an empty cell where the workers collect pollen and fill the cell, then the queen comes along and lays an egg that hatches into larva, the bees feed the larva into its pupa stage, when they reach that stage they cap the cell for the final stage of development and eventually a mature bee chews its way out and joins the hive !


Here is an up close image of a decent frame that has several stories to tell.

After seeing what I was pretty much expecting after a few quick checks ins over the last few weeks I was glad I had gotten 8 new frames made the evening before because this hive is ready for another box. The typical set up of a hive is two deeps, which is the taller size boxes. In these boxes you let the hive manage their population with the cycles of the larva and pupa. The hive will clean out cells after they hatch and get them ready for the queen to come back around. The typical life span of a honey bee is 5-7 weeks for the workers and 2-5 years for the queen. Though most beekeepers recommend requeening your hive every two years. Anyhow with the first deep filling up with brood it was time to add a second level and fill it with wax foundation frames so the hive can continue to grow and flourish into a pollinating and honey making machine !


After adding the second deep I placed the top cover back on and gave them back their sugar water feeder to help keep the wax production at a maximum as they draw comb out in the new deep.


Because I only had two deeps and they are now full of frames I used my two medium deep or honey supers as some people call them to hide the feeder on top of the deeps. This method seems to be working quite well as the hungry workers come up the top cover and feed without any mess or intruders being able to gain access. Typical sugar water robbers are bees from other hives, ants and predatory insects like wasps and yellowjackets that can reek havoc on any hive, especially one that is still in its building stage. 


After reassembling the hive I spread some newspaper around its perimeter and laid some cedar mulch on top of the newspaper around the base of the hive to keep the weeds from getting too ambitious. Normally I would just use my lawnmower or weedwacker in this area but something tells me the bees may get a little grumpy if I tried that method. Cedar mulch is also a natural ant and beetle deterrent so if it works out the way I planned it, then I have accomplished two goals with one action ! Always a plus with a long to do list. 


Another adjustment I made to the hive was to switch the entrance reducer from the smallest notch which is about 2" long to the medium notch which you can see in the picture that is closer to 4" across. Once the hive builds up to full strength I will remove the reducer completely but for now it helps them regulate who is coming and going from the hive a little easier. Its amazing how just watching the entrance of the hive for a few minutes every evening you can see the complex relationships a hive can have. The movements and actions of each bee are so interrelated and understood. I wish sometimes people could act more like these complex systems that bees, ants and many other species follow instead of only coming together in times of great peril or catastrophe. Instead we spend much of our time arguing over money and politics and who is doing what in the name of this or that religion. Yes, I digress but it does give you a glimpse into the lessons and knowledge that nature can teach us if we slow down a bit and put in a little extra effort 
in our daily lives.


On that note I leave you with a collection of pictures I snapped while studying the habits of my pollinators as they gorge on the vibrant blossoms of our Prairie Fire Crab Apple tree in our front yard. It lies only about 20 yards from the hive and has been bustling with activity since it bloomed a week or so ago !

Till next check in where I will be talking about our expanding garden beds, some landscape work and many more projects that are underway here at the Localrootz Homestead.


Sunday, April 17, 2016

Buzzing Bees, Garlic Shoots and Planted Peas.

So as promised in the last post... the bees arrived this weekend !


We got a supply of Italian bees from Backwoods Bee Farm in Windham.
The hive consist of about 10,000 bees and a marked queen. The mark is put onto the queen with a marker prior to delivery to help newbie beekeepers like ourselves with locating the queen once she is released into the hive. I say once she is released because she comes in a separate little box that is inside the cluster of bees in the package. It isolates her during the journey. The hopes are that the queen will be healthy and the hive will accept her once she makes her way out of her cage and the magic of the hive begins. The mark is white this year and it also helps beekeepers remember how old the queen is as there is language of color coding that happens from year to year. The queen has the most important role of the hive, without her there will be no reproducing and growing the colony into a healthy 30,000 plus bees needed to thrive and do what bees do best, pollinate and make honey !


All the tools ready for hiving the bees. Sugar water, frames with foundations, the inner cover and of course the hive roof.


So the key to hiving a package is to pry the lid off, inside there is a metal can that is filled with sugar water solution that keeps the bees fed during the journey. Wedged in between the can and the opening is a metal tab that is attached to the queen cage. After prying off the lid and removing the can I brushed the cluster of bees off the queen and set her aside while I gave the rest of the package a good shake into the prepared hive body. When I shook the bees from the package into the hive I had the middle four frames set aside. I then proceeded to gently slide the frames into place and wedge the queen cage in between the middle two frames using a piece of duct tape to make sure the cage stayed in place. Before putting the queen cage into the hive I removed the bottom cork from her cage... it has another plug behind the cork that is made of sugar. the idea is the queen will chew her way out and the colony will chew their way in and hopefully when the interaction finally happens everyone will be happy to see each other and the process of rearing new brood will begin. A healthy queen will lay 1500-2000 eggs a day and within three weeks they will hatch into full grown bees ready to work work work ! The whole hiving process took around 15 minutes and there were lots of bees buzzing about but I wasn't overly nervous as they seemed very playful and happy to be free to buzz about on a warm sunny afternoon.


Here you can see the queen cage with the cork still in the top, the sugar plug is on the bottom side where I took out the cork. Ill be opening the hive on Monday to see if she has made it out yet. Its very important to monitor her as without her the chances of the hive surviving and thriving are slim. 


After placing the inner cover in position, I then added a feeder filled with sugar water. Then I put the hive lid on and placed the shipping package with a handful of straggler bees near the hive entrance and gave them some space until the morning.


The next morning I took a quick peek into the top box that held the feeder, it was early and still pretty chilly so they were not very active but as you can see they were finding the nectar which will help them produce plenty of beeswax comb in preparation for the queen to start laying.


Here is a video from this afternoon where you will see the hive buzzing with activity.  I was excited to work on some garden projects while the hive oriented itself to our surroundings.


 First on the list of planting this weekend was some Bloody Dock Sorrel... its a perennial that takes a year to really establish but its a good deer deterrent and I have always enjoyed its bitter, citrusy flavor. Its a great garnish for fish or a nice addition to some hot weather salads ! 


From there it was on to the peas and salad greens... I knew I wanted to use the log cabin style bed as I watched the way the sun passed over last summer and this spring so it seemed a good fit for a trellis. I am trying to rotate and succession plant a little better this year... plans are the peas will be replaced by cucumbers which will also benefit from the trellis as well as provide some shade to the rotation of salad greens as the summer heats up. I added a dressing of fresh compost and graded the bed gently with a bow rake. Now I had to figure out what to use for the trellis... my first thought was a grid of twine, but after a little searching in the basement and shed I had a better idea.


I found a leftover roll from the fence we constructed last summer and after unrolling it I had just enough to run a twelve foot span along the raised bed. Then behind me I remembered a small beech tree that I had chopped down last weekend to make a little more room for the slowly evolving compost bin system. After sawing that into a couple 7 foot sections and sharpening the bases into stakes with my hatchet it was all coming together. 


 I pounded the 7 foot stakes into the ground and secured them to the raised bed with a few screws. Using a roll of stainless steel wire I then cinched the wire fence to the stakes and the final outcome seems like it should work quite well for peas and cucumbers !


I soaked the peas I was ready to plant for a few hours in a solution of fish emulsion and warm water.
The final planting was a straight 12 ft row with 76 peas planted.

33 Sugar Sprint Snap Peas / 10 Burpeanna Early Peas / 33 Little Marvel Peas 


Along with the peas I also sectioned off five different areas to start the bed of salad greens ! 
Seeds planted; Gigante d'Inverno Spinach, High Mowing Mesculin Mix, Tatsoi, Mache 
and Wrinkled Cress


Still making great use of that Benson's organic surf & turf compost mix and that makeshift bin I constructed last fall held up over the winter !


Another exciting addition to the homestead is our first fruit tree...
a Red Haven Peach tree  


and I had to put one grape vine in the ground this Spring, and Elvira was her name.


 We also uncovered the garlic from the leaf mulch that we placed over the winter and were excited to see what appears to be every clove sprouting away ! I snagged a bale of straw that I hope to be able to dress the bed with this week to keep any weeds from becoming an issue as the growing season warms up.


Another fairly large task that I got made some progress on and have a few scratches to prove it was pruning back the brambles. They seem to not have been dealt with in many years and have spread like wildfire. Im trying to cut all of the canes back only leaving a few of the healthiest and strongest. Hoping over the next year or two to create a nice natural fencing along the soon to be fruit tree patch with the remaining canes,but this is a battle that will be long and arduous.


Well that is my weekend update from this week. Quite productive and my limbs feel like they got a good workout. More seedlings to start this week, getting a little behind but without a greenhouse just yet Im looking at six weeks of seed starting for my tomatoes, eggplant and pepper which I am hoping will all be started by the middle of this week and planted around Memorial Day ! 

Till then I leave you with the fingerling potatoes that are prepping to plant as the eyes form this week.

Thanks again for all the great support, words of encouragement and as always feel free to leave any questions or comments below or email me lukaduke@gmail.com 
Related Posts Plugin for WordPress, Blogger...