Wednesday, June 17, 2020

Planting, Trellising, Mulching and Sowing!


As the temperatures warmed the peas broke through the compost layers and reached forward to sunnier days and warmer nights.


I spent a couple hours constructing a small cold frame using some found materials so I could get my seedlings out of the basement. The results were great until I had a few casualties due to a very early morning heading out to work when the temps were still below 40... by the time I got home later that day it was 80+ and the temp in the cold frame soared to 115. 


We also got a last minute appointment with a local arborist friend to come by and limb up the maples and oaks around the homestead that were long overdue for it and also had a few trouble spots that quickly got remedied. He always enjoys limbing, especially when I tell him to just leave the branches where they lay and I'll take it from here. Though it always translates into a much bigger mess than I anticipate. My general course of action is to go in with a big pair of lopers and clear out all the leaf bearing branches and start 4 piles. Green Branches/ Long Straights/ Short Straights and Firewood. This time I also made a point to set aside a dozen mushrooom growing sized logs as well!


Maple logs are ready for their mushroom inoculation!
(more on that process in a future post!)


Germination !


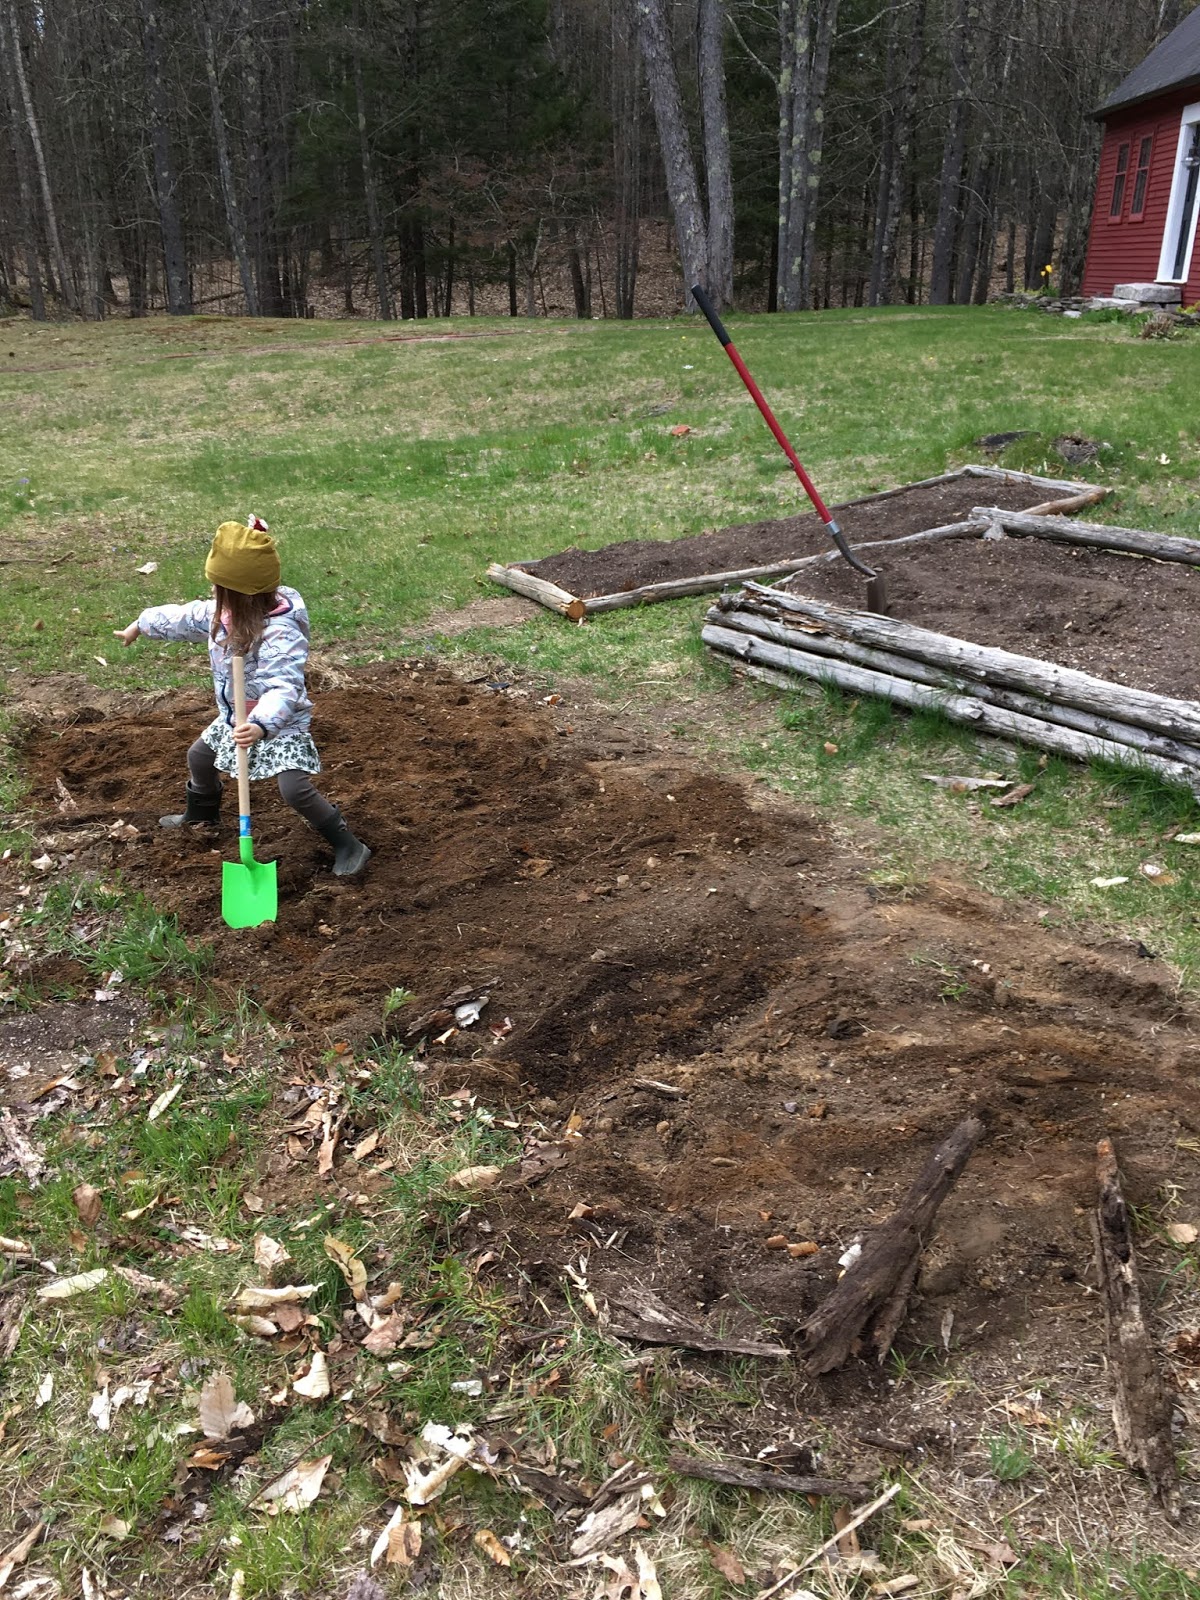
Hazel has been a great garden helper this year at age 3 and a half... her favorite garden projects are watering the thirsty plant and you may have guessed, DIGGIN BLACKBERRIES!


Everyday like clockwork Ive been hitting the trench with Hazel and our shovels, digging up the numerous blackberry shoots that pop up daily. Eventually I will either cover all this area with tarps to smother the remains or sheet mulch with cardboard and woodchips to make it more aesthetically pleasing.


Did someone say mulch? We got a drop from the local garden supply that gets their mulch from a local lumber mill and this one was hemlock which is completely natural and has some pest resistant oils that is a bonus for using around the perimeter of our raised beds. 


The process is pretty simple, make a woven layer of cardboard, make sure you remove all stickers and tape, I use some that have limited ink on them but not sure its all that big of a deal especially because Im mainly using this process in the pathways of my raised beds and to smother overgrowth. Anyhow, use a hose and wet the cardboard thoroughly and then apply 2-3" of mulch on top! 


I also used a hand edger and carved a nice trench with a shovel to delineate the line of grass and mulch that hopefully that will minimize the weeding in our growing space. 


Don't forget to make the homestead a little more homey with a fresh mulch on the front rock beds we constructed a few years ago too!


First section complete... now on to edging around the tomato bed and smaller flower beds.


Sugar snap peas are climbing, lettuce is getting harvested by the leaf, onion, kale, cabbage, various peppers, eggplant, beets, chard, pickling cukes, nasturtiums, corn and chard in these beds.


Three varieties of beans, osaka greens radish and carrots in this bed.


In the foreground is our potato tower that is sprouting with Adirondack Blues and Green Mountain taters followed by the added half moon bed thats planted with two types of cukes, sugarbaby watermelon, some strawberry transplants and marigolds.


I found the tomato bed to be successful but really only the left side receives enough full sun to ripen tomatoes to a suitable sizing, therefore I transitioned the right side into a salad bed where I spread various leftover seeds including multiple varietals of arugula, watercress and various lettuces along with cilantro and parsley! This section will get planted every 2-3 weeks and hopefully that will provide us with our daily salad provisions throughout the growing season.


Loving the organic curves of the beds as they lure me in and invite me to weed and pay even more attention than typical.

 Overall Im very excited and motivated to continue pushing the homestead into the next chapter and really harnessing the useful space by smothering the negligence of past seasons and enriching the productivity and potential of the rest of the land before us. 


Ladyslippers where in high production this year, usually I count 5-8 around the homestead, on one occasion this May I counted 14!

Stay tuned for a Mushroom Log Inoculation post as we wrap up this week


Friday, June 12, 2020

Spring Digging.


So Spring did what spring tends to do here in Maine by ebbing and flowing from 30 degree mornings to 70 degree afternoons, followed by blankets of wet snow and stretches of rainy muddy days. Eventually the colder mornings slowly subsided and the the ochres and grey tones started popping up with hints of greens and yellows. This year with our little Hazel getting older we found a little more time to get the garden back in order and to start a broader plan for organizing our current usable growing space.


At the end of last season I pulled up the quick fence I had surrounded the raised beds with 4 years ago as it always made raking and mowing a real chore and the look of it never aesthetically pleased me all that much. One major issue I've been dealing with after cutting down those two maples (see stumps  in brush pictured above) was that in achieving my objective of letting in more sunlight to the A-frame style bed that I use for tomatoes (top left of picture)... its also opened the door for the few wild blackberry bushes in the brush to explode!


 At first I was excited to have an abundance of blackberries and I just trimmed a few canes here and there and utilized the fruit in some ciders and wines that I made, but then they started finding the rich compost in my raised beds and spread like wildfire throughout the growing space overtaking way more than I expected. Some of these canes are over an inch wide with spikes that ravage anything that comes close to it


Needless to say I was feeling pretty hopeless and defeated leading into this growing season. I even started researching renting a bobcat to help dig up the mess but even then I knew the rootballs and runners would be impossible to get all of and I would be back in the same spot in another year or two. My only solution was to get angry and grab a shovel, but first I needed to trim these canes back as they were carving up my arms and legs and ripping through my clothing whenever I got after them!


I made some head way digging and pulling them from my largest bed but I knew that simply spreading more compost on top and planting veggies would result in a similar mess next year and the canes would surely effect the growth of my veggies by disturbing the roots... so the decision was made to draw a line in the soil with a shovel,  a moat if you will and deconstruct the bed and get at the root of the situation!


I spent a couple days just trimming canes and burning them, which gave me some satisfaction but they had the last laugh as my hands, arms and legs looked like I was thrown in a room with 50 rabid cats and it didn't help that this was also the start of the pandemic so everytime I sanitized my hands the sting would make me cringe a little bit, ok ok enough complaining! Back to digging...


The other lesson I learned was NEVER to use landscape fabric as a base to a raised bed ever again. It ripped into a million pieces while I was trying to dig up the bed and turned a big headache into an even bigger one... luckily due to the cost I didn't use it on the other beds but sifting little pieces of landscape fabric out of my compost wasn't the funnest job so be warned! Also it clearly didn't work to keep the blackberries out so basically it was a useless $30 roll of trash. The good news is all the decomposed logs were easily burned and considering they cost me nothing I was happy with the end result of deconstructing the bed. I was able to spread the ample compost from the deconstructed bed into the two remaining beds and also made two new beds that were longer and narrower than the ones I made 5 years ago when we founded the Localrootz Homestead!


Here is our Hazel getting into the digging, after a couple days we got the majority of blackberry roots out of the soil and decided the best thing to do with this area was to cover it and smother it!


Along with this bed there is a swath of blackberries and other various overgrowth creeping into the open space all along the perimeter of the growing space so I continued the trench to make a moat between the overgrowth that I will continue to battle through the summer and beyond and the area that I want to get under control right now.


Good exercise is that which ends with positive results and not only did I spend a few days digging trenches but I also uncovered quite a few worthy rocks destined to be wall stones as our soil is littered with lots and lots of rocks being on the top of a large rock ledge!


After a couple weeks of deconstruction and destroying things it was nice to start concentrating on building things, growth, and nurturing !


Utilizing piles of composted leaves and rich compost from two years of table scraps and garden waste it was time to start putting a fertile base for this years season! 


Each new bed was piled with 6-12" of composted maple and oak leaves and then dressed with 6-12" of fresh compost!


I utilized some of the old t-posts from the torn down fence that will provide good strength for trellising and decided it was a good time to get some seeds started in the basement and plant the first batch of snap peas to get the season underway.... nature agreed and start popping up some deeper shades of green along with a few blossoms!


7 Varietals of Peas mostly snap and a couple shelling type and a perfect planting project with a 3yr old!


The Purple Passion Asparagus started showing itself as well !


As the seeds germinated it was time for some garden planning for the upcoming growing season!

Thanks again for stopping by! 

Another update on its way shortly...

Related Posts Plugin for WordPress, Blogger...